


How to Transfer Data from One microSD Card to Another on Switch (Mac Edition)

The Switch has a ton of games, but unfortunately it only uses microSD for external memory. In terms of speed and performance, microSD is pretty good, but most players will purchase the cheaper priced cards and run out of space before they realize it. Well, the good news is that transferring your data from one microSD card to another is not that complicated, so if you do decide to upgrade your external storage, there are no worries in that department.
However, transferring data requires a personal computer, and if you search online right now, there are tons of guides for how to do this on Windows-based computers while Mac-based guides are lacking or are completely wrong.
As I have just performed multiple transfers recently using poor guides and failing miserably, I can assure you that the following is a step-by-step guide to transfer your data from one microSD card to another on a Mac-based computer with no problem at all. Let’s make that transfer!
microSD Card Transfer on Mac
- Connect the new microSD card to the Mac using either the SD card port (a) or a microSD USB Card Reader (b).
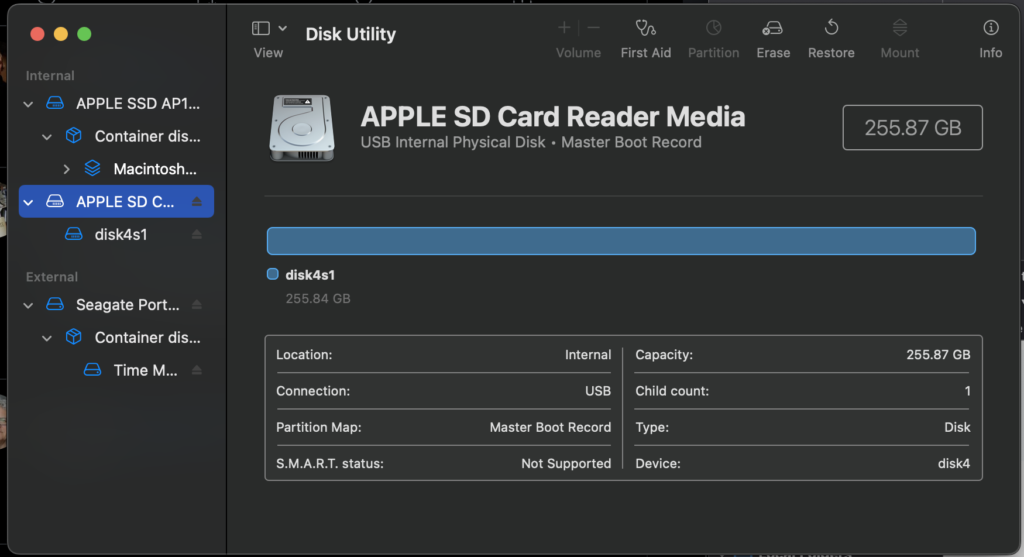
- Open Disk Utility. If you are having trouble finding it, click on Launch Pad in your Dock, and then type “Disk Utility” into the search bar.
- a) If you are using the SD card port on your Mac, select the parental partition, not the actual SD card slot (See image above). Make sure you do not have multiple SD cards connected to your Mac.
b) If you are using the microSD USB Card Reader or some other USB device, simply select the external port. - After selecting the correct partition, you want to click “Erase”, and then when given the options, you want to give the new microSD card the exact same name as the one you’re using currently on your Switch. For the Format, select “MS-DOS (FAT)”, and then click “Erase”.
- It should be quick, but your microSD card will be rightly formatted.
- Eject the new microSD card.
- Insert the old microSD card into your Mac.
- Copy the entire “Nintendo” folder from your old SD card onto your desktop for easy location. This may take a while depending on how large your previous storage is.
- Once it is copied to the desktop, eject the old SD card and remove it.
- Re-insert the new SD card, and now copy the “Nintendo” folder from your desktop to the new SD card. This may also take a long time depending on the previous storage size.
- Once it is finished transferring, eject the SD card, remove it from the Mac, and put it into your Switch. Make sure it clicks into place when inserting it into your console. If all was followed correctly, it should be working, and you should have more storage (Or the same or less if you are weird).
Thank you for stopping by Nintendo Link for all of your gaming guides and helpful resources! What do you think of this microSD card transfer guide on Mac? Did you find it helpful? Let us know in the comments below! Happy gaming, everyone.
